搬瓦工搭建VPN教程 – 低价VPS搭建VPN
本文是关于搬瓦工搭建VPN的教程。搬瓦工是有名的低价VPS供应商。一般是49.99美金一年,促销的适合甚至更低,速度也不弱,除了经常断货,基本没毛病。
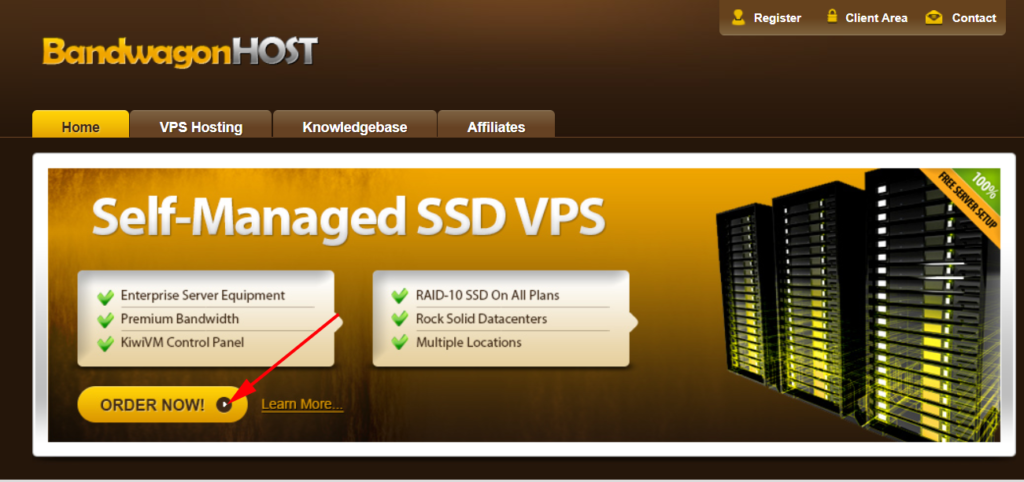
第一步: 点击搬瓦工官网,点击Order Now 购买对应的VPS主机
注意:搬瓦工的官网经常会被墙,如果被墙给我留言,我会定期更新。
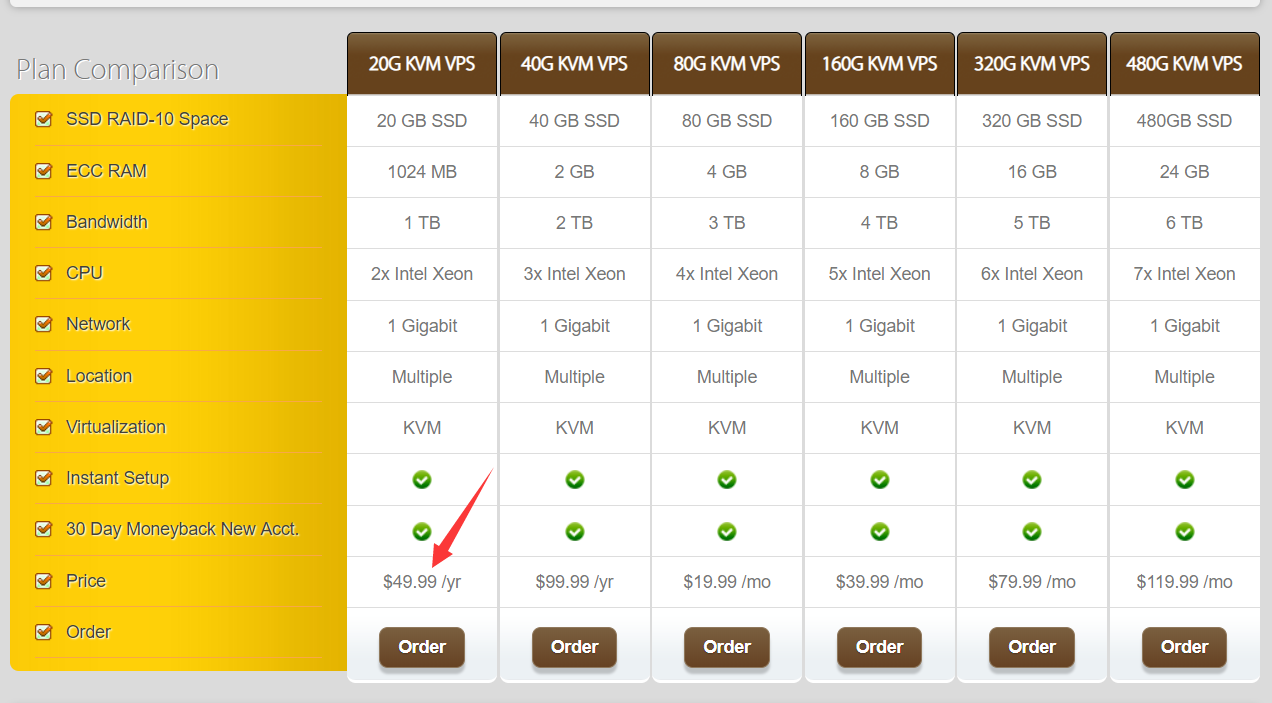
进入之后,找到49.99USD一年的VPS主机,点击Order 【合计每月4美金左右】
会自动跳转到如下页面,然后选择对应的服务器位置【随便选一个即可,我一般用美国】,点击Add to Cart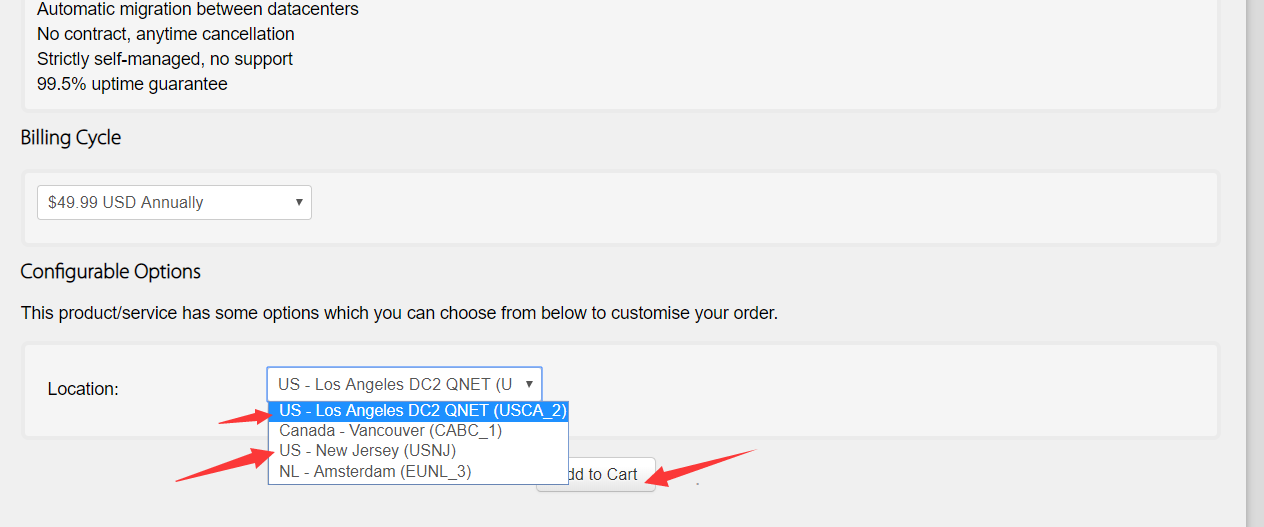
点击Check Out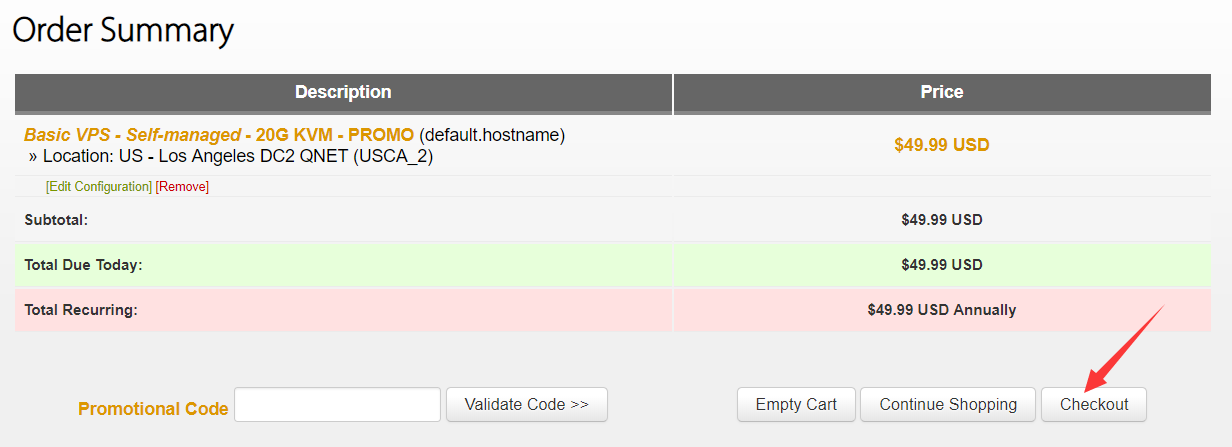
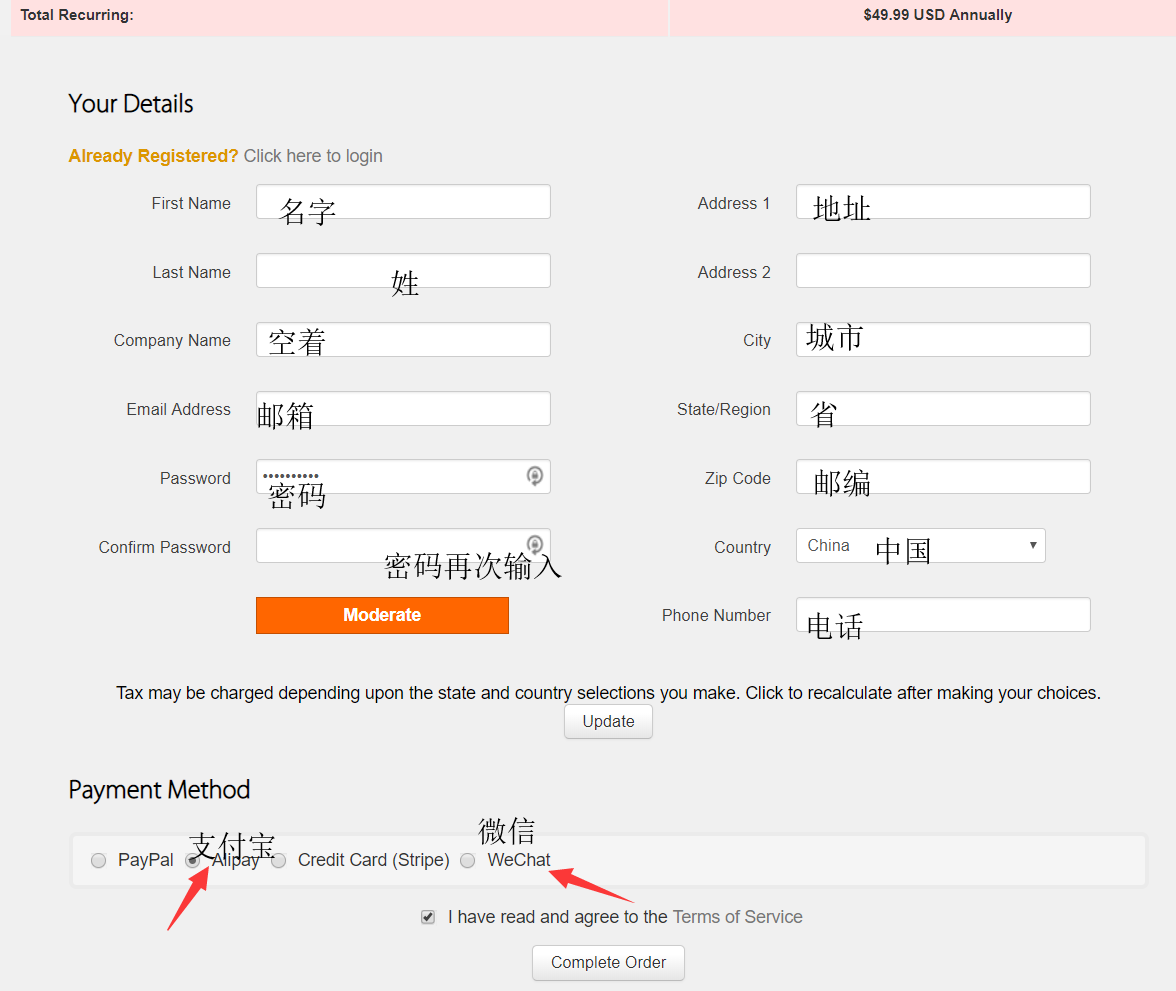
填写个人信息 Your Details ,然后点击Update ,选择付款方式 Complete Order完成订单即可。
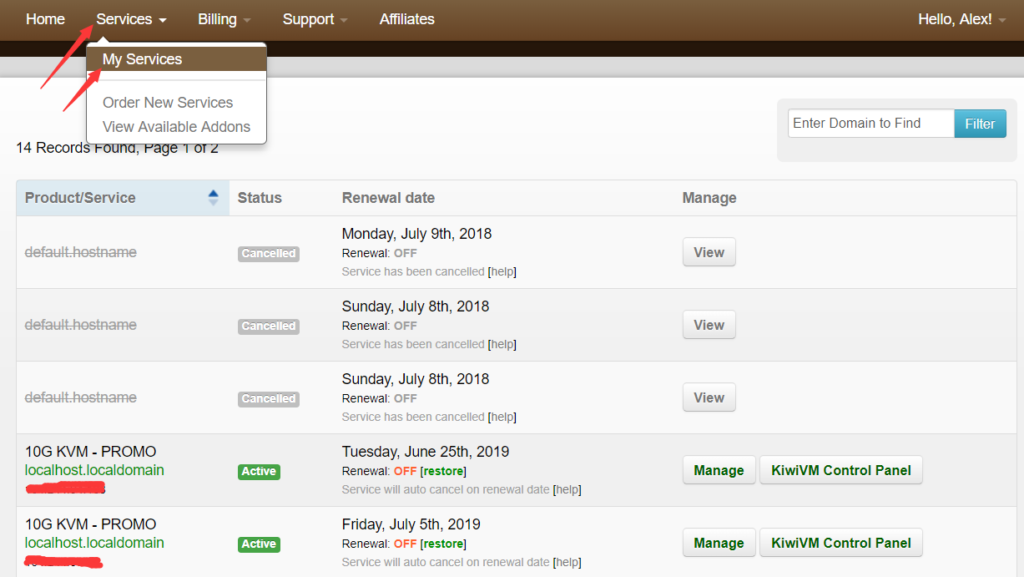
然后进入自己的后台,点击 Services - My Services,可以找到已经购买的服务器
第二步:利用 VPS搭建VPN
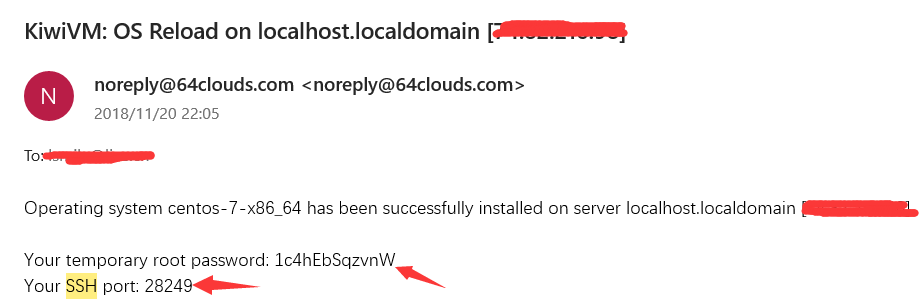
1. 点击对应VPS右侧的 Kiwi VM Control Panel 进入到控制面板 记录服务器IP,SSH Port 以及 Root Password 服务器密码

这些信息可以在两个地方找到
第一:VPS部署完成之后,查看注册邮箱,会收到一封VPS的邮件
服务器IP;密码和端口可以在这里找到 【红色部分盖住的就是IP地址】
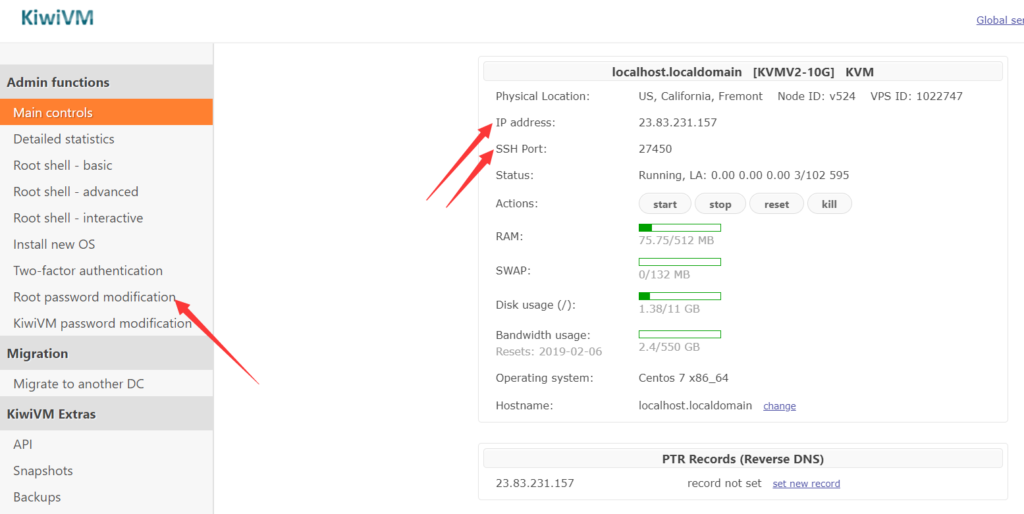
第二:SSH和IP也可以在控制面版找到
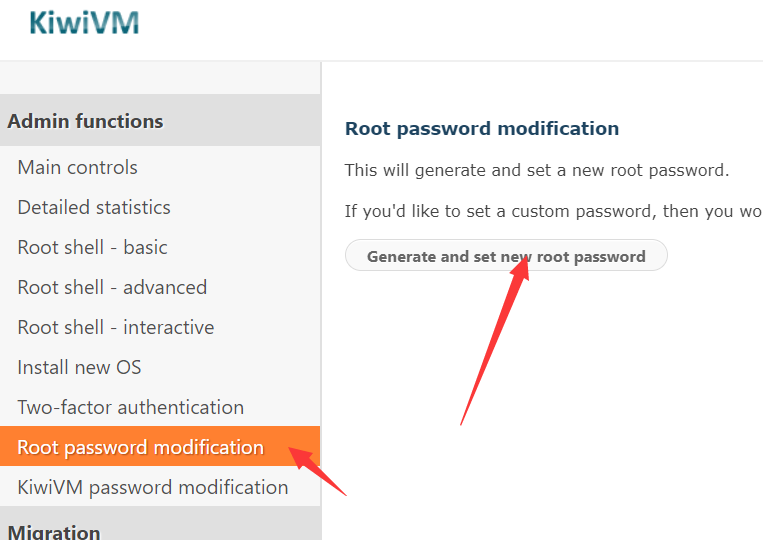
如果一直收不到邮件,可以点击 Root Password Modification 自行重置密码
重置密码后自行保存密码,下一步连接登录适合要使用到
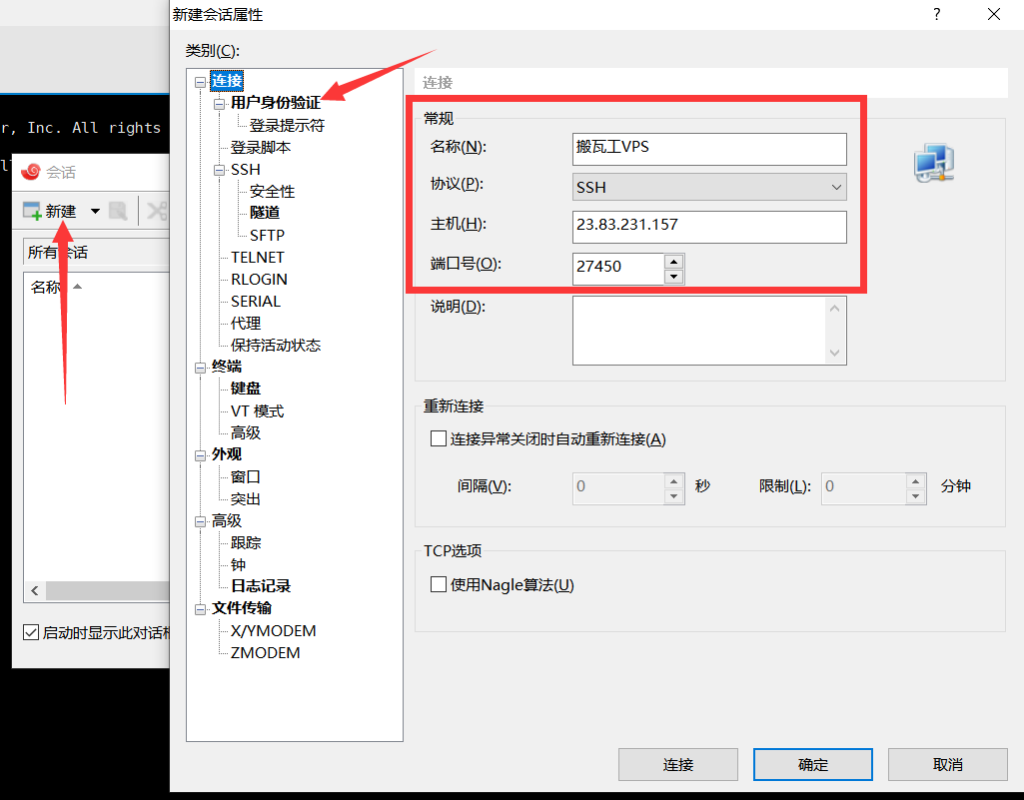
- 通过Xshell等SSH工具登录 VPS
IP:23.83.231.157
Port: 27450
Password: GHjCFayhhQhh
以Xshell为例,没有安装的需要下载xshell程序先安装,打开程序新建连接 然后输入 IP地址 和端口号
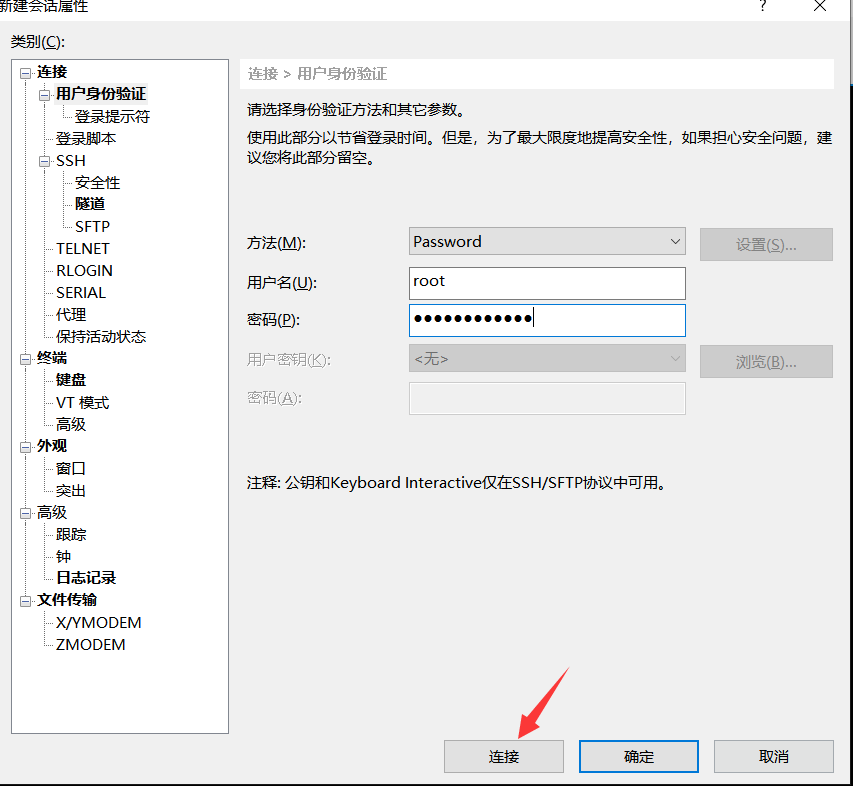
点击用户身份验证 输入用户名和密码
用户名: root
密码:就是 刚才邮件或者重置密码后获取的密码
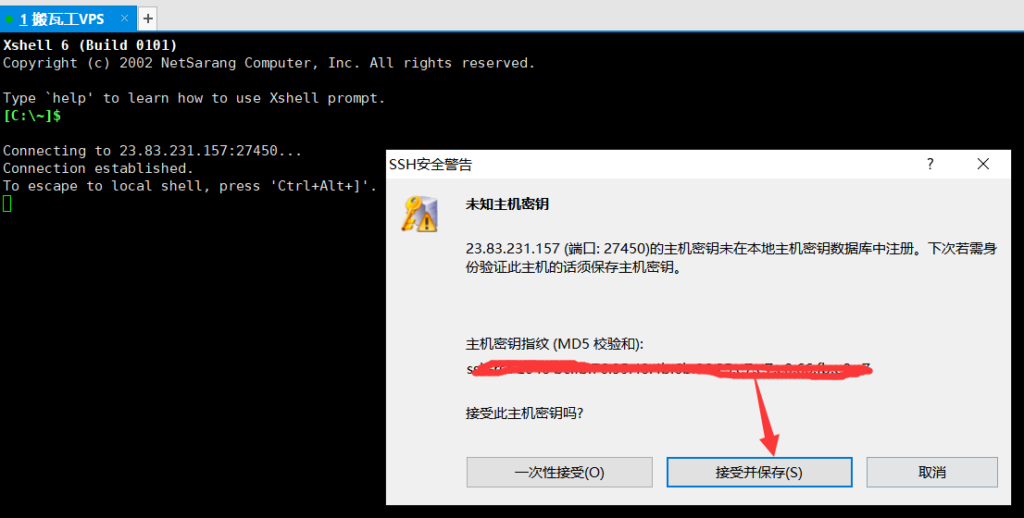
弹框询问,接受即可
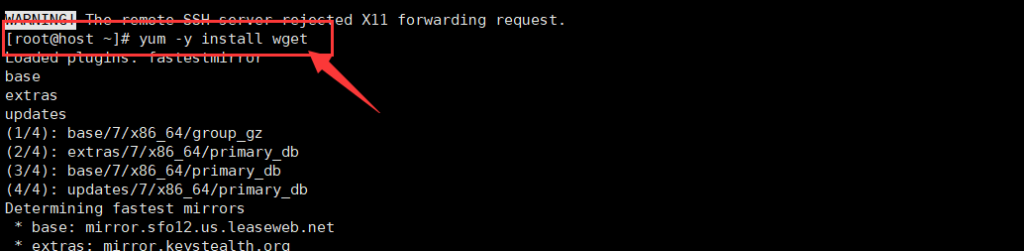
这点和Vultr搭建VPN的方式略有不同,需要先输入代码,按Enter键
yum -y install wget
复制右键粘贴即可,然后按Enter键
然后输入代码,然后按Enter键
wget http://w.huizhanzhang.com/shadowsocks.sh && chmod +x shadowsocks.sh &&./shadowsocks.sh 2>&1 | tee shadowsocks.log

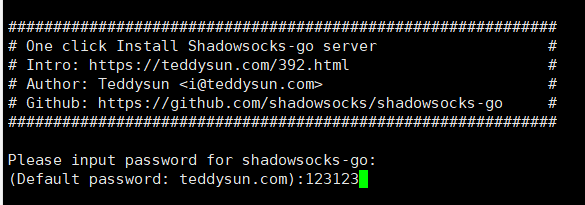
到以下这一步之后,输入VPN登录密码,按Enter键
设置端口号【1-65535之间的任意数字】,随便输入一个数字即可
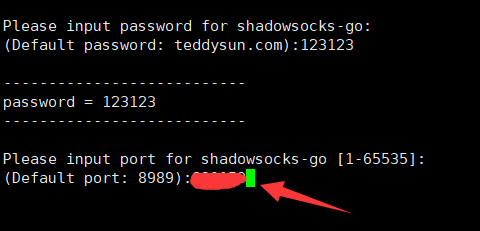
然后提示单击任意键继续

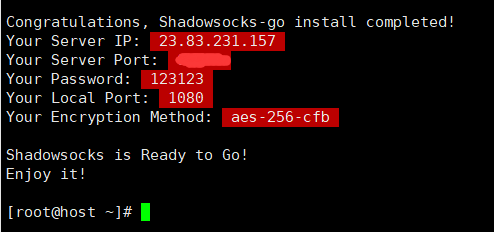
安装完成;
3.使用SHADOWSOCKS进行连接
1.下载Shadow Socks软件(我用的是0.10版本)
https://github.com/shadowsocks
2.打开软件,填写刚才我们保存的信息:
服务器地址(填写Your Server IP)
端口号(填写Your Server Port)
密码(填写Your Password)
加密方式(填写Your Encryption Method)
代理端口(填写Your Local Port)
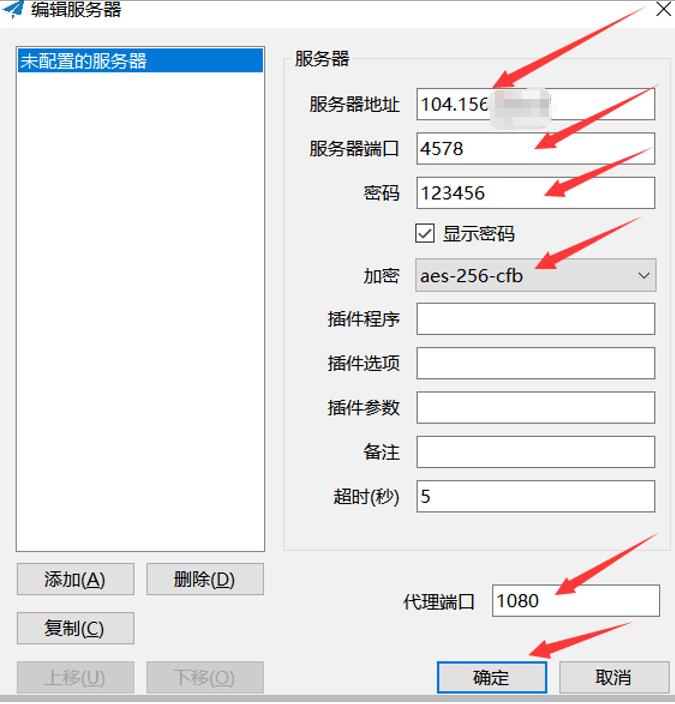
3.点击确定后,右击软件小图标,点启动系统代理

4.出现弹窗后点击允许

5.到这里整个步骤就完成了。
熟悉的界面
标签
评论 (0)
发表评论
加载评论中...